
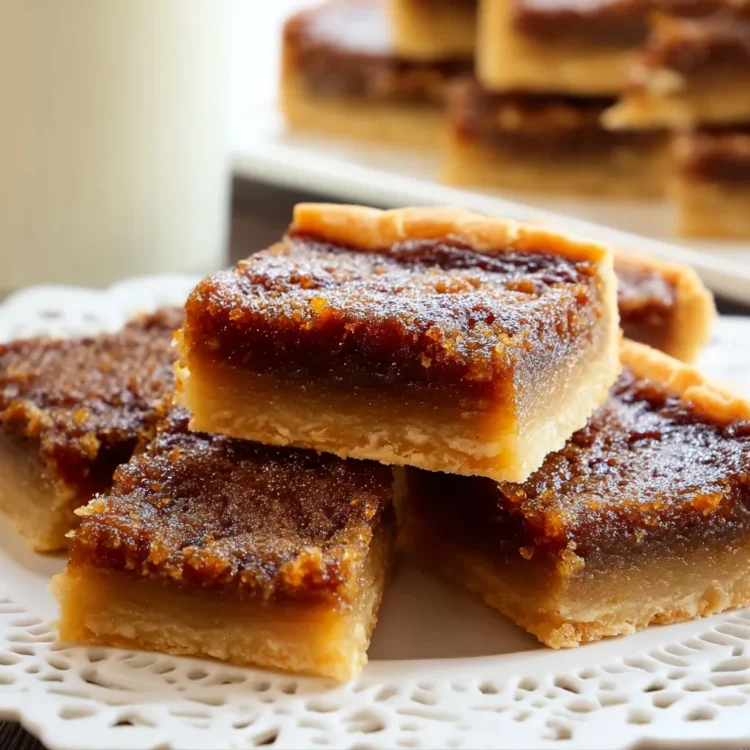
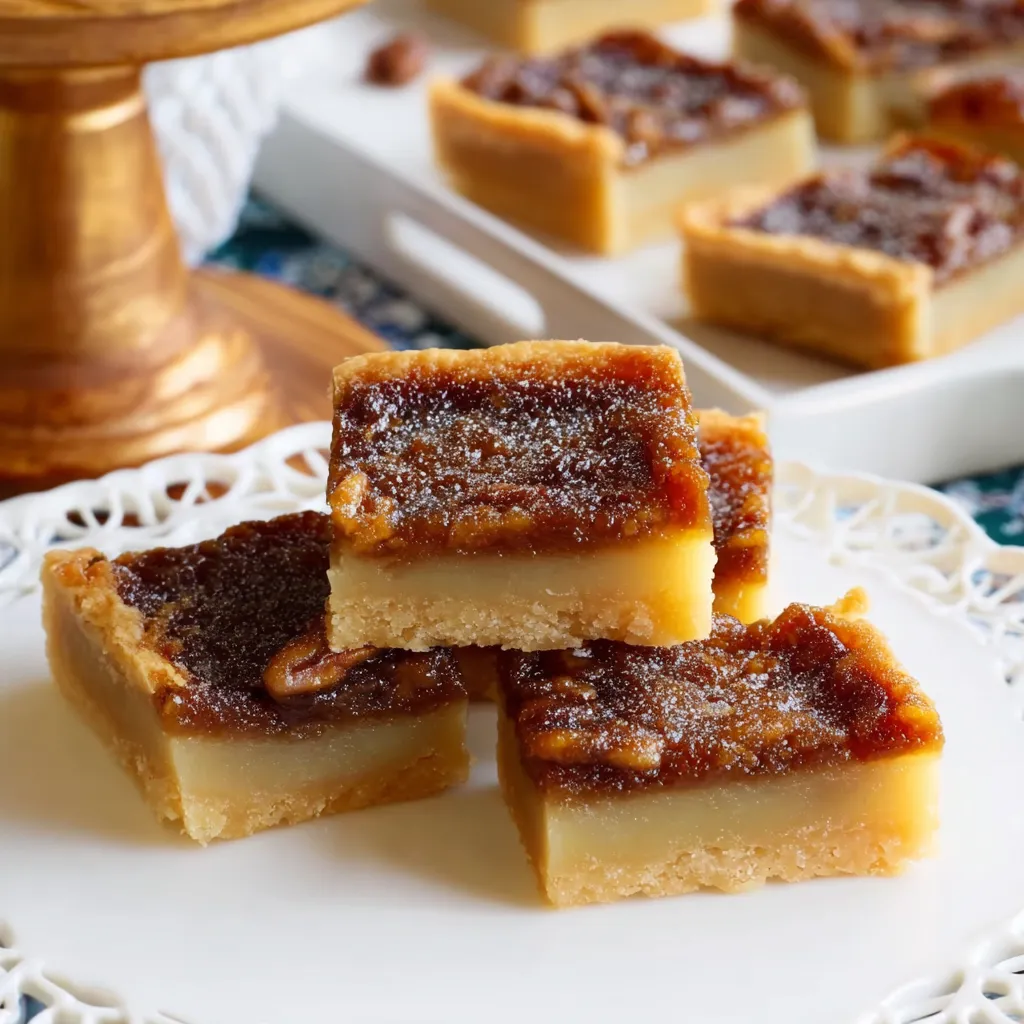
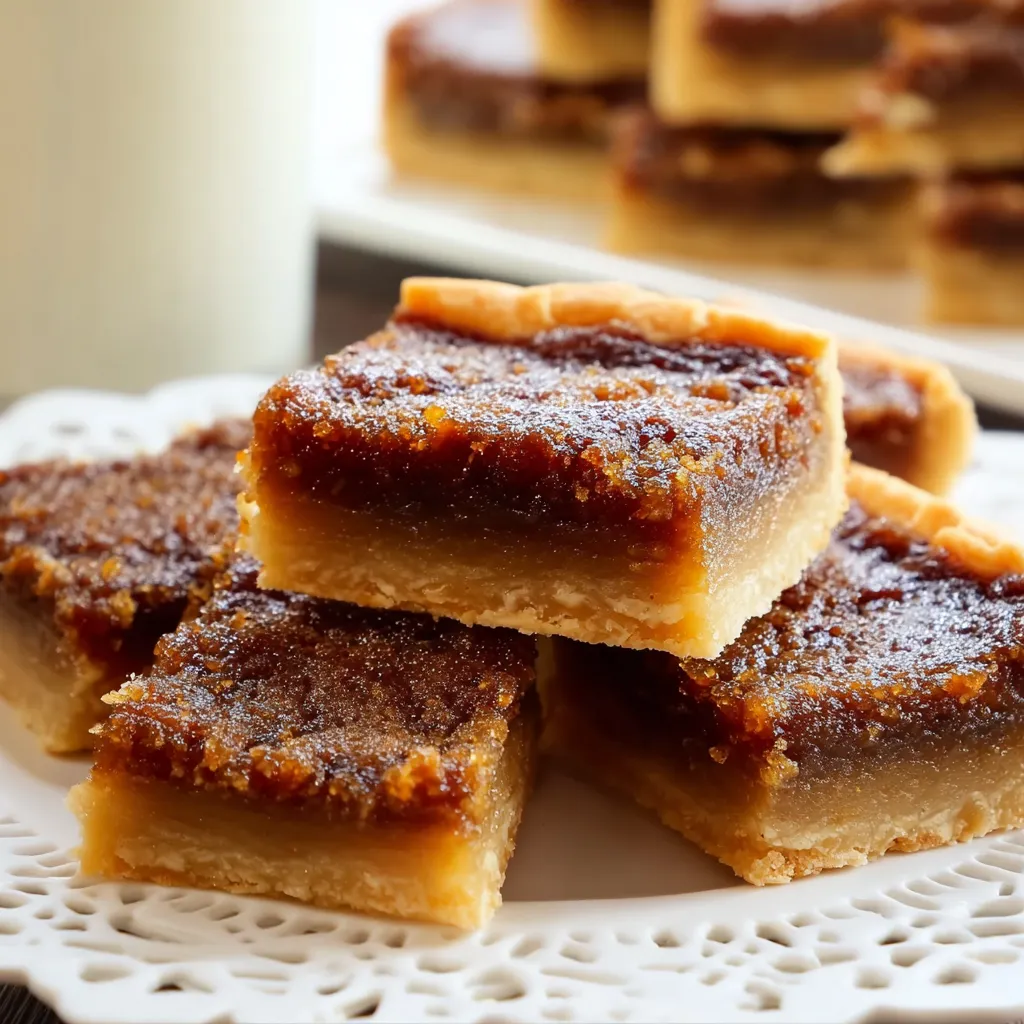
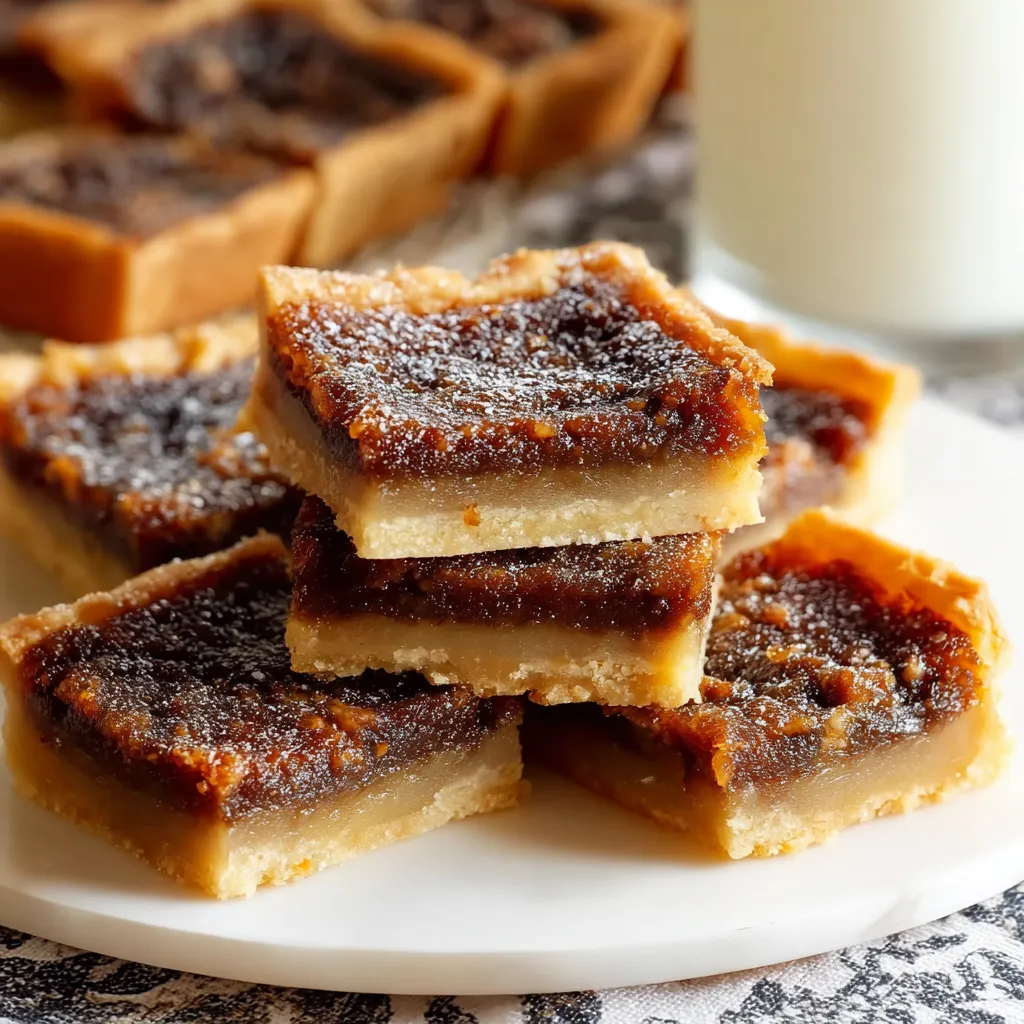
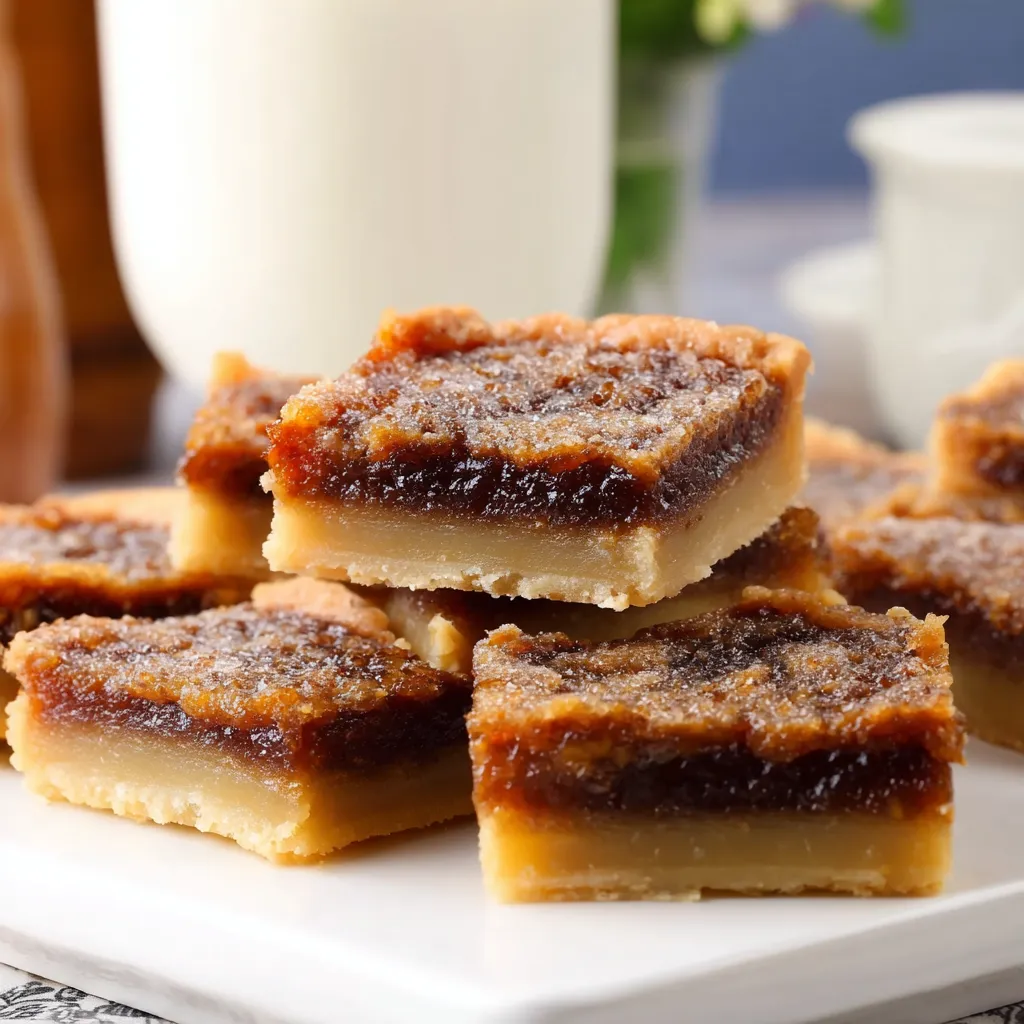
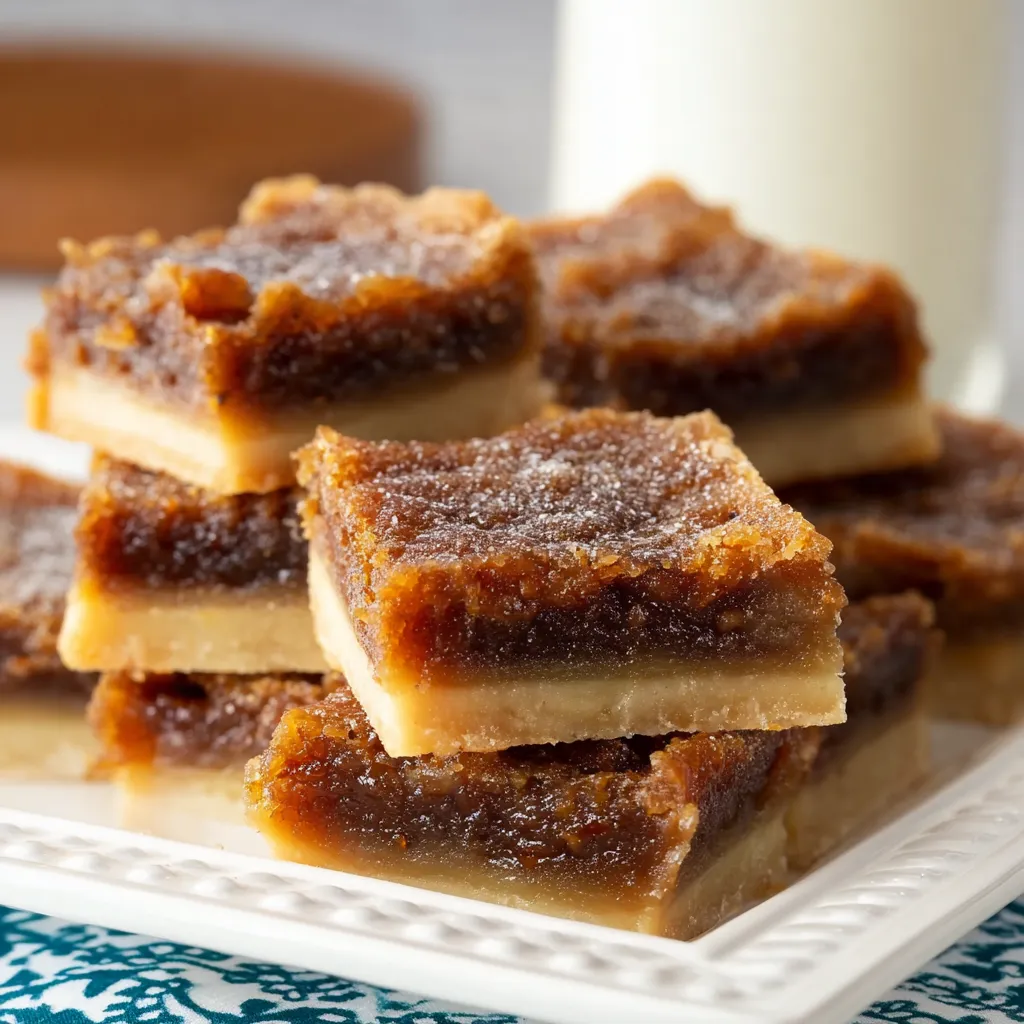
Butter Tart Squares are a quick and delightful alternative to the traditional butter tart. Their irresistible gooey filling and buttery shortbread crust make them a treat you won’t be able to resist. Unlike the classic butter tart, these squares offer a simpler, faster method to enjoy this beloved Canadian dessert. Whether you’re baking for a holiday, a family gathering, or just to satisfy your sweet tooth, Butter Tart Squares are perfect for any occasion.
But what makes Butter Tart Squares so special, and how can you make them even better? In this article, we’ll dive into everything you need to know about this mouth-watering dessert. We’ll cover the essential ingredients, the easy-to-follow recipe, tips for getting the perfect texture, and ideas for variations to make them your own.
What Are Butter Tart Squares?
Before we get into the recipe, let’s define what makes Butter Tart Squares stand out.
Butter Tart Squares are essentially a simplified version of butter tarts. These squares have a shortbread crust topped with a sweet, gooey filling made primarily from brown sugar, butter, eggs, and vanilla. You can also add raisins for extra texture, although they are optional. The result is a decadent, melt-in-your-mouth treat that is rich in flavor but surprisingly easy to make.
Unlike traditional butter tarts, which require you to prepare individual tart shells, Butter Tart Squares allow you to bake everything in a 9×13-inch pan, saving you time and effort while still delivering that beloved buttery flavor. They are cut into squares after baking, making them a more convenient and mess-free version of the classic tart.
Why You Should Try Butter Tart Squares
- Quick and Easy: The main appeal of Butter Tart Squares is how simple they are to make. You don’t need any fancy equipment or complicated techniques, just a few basic ingredients, and a little patience while they bake.
- Perfect for Sharing: With their easy-to-cut shape, these squares are ideal for potlucks, parties, or any social gathering. They’re easy to transport, and everyone will love the homemade touch.
- Customizable: The beauty of Butter Tart Squares lies in their versatility. You can tweak the recipe to suit your preferences. Whether you like your butter tarts with raisins, nuts, or a hint of maple flavor, there are plenty of ways to make them your own.
- Indulgent Yet Simple: These squares are the perfect blend of buttery richness and simplicity. No need for complicated ingredients—just the basics for a perfect, indulgent dessert.
The Essential Ingredients for Butter Tart Squares
To create the best Butter Tart Squares, you’ll need to have the right ingredients. Here’s a breakdown of what you’ll need and what each component brings to the table:
- All-purpose flour – This forms the base of your shortbread crust. It gives the crust its structure and texture.
- Powdered sugar – Adds sweetness to the crust while making it more delicate and melt-in-your-mouth.
- Unsalted butter – The star of the recipe, butter adds richness to both the crust and the filling. Use cold, cubed butter for the best results when making the crust.
- Brown sugar – This is the main sweetener for the filling, giving the squares their signature caramel-like sweetness.
- Eggs – Eggs help bind the filling together, making it thick and gooey once baked.
- Vanilla extract – For added flavor and depth in the filling.
- White vinegar – A traditional ingredient in butter tarts, the vinegar helps balance out the sweetness of the sugar, giving the filling a more complex flavor profile. (Note: You can adjust or omit this if preferred.)
- Raisins (optional) – For those who like a chewy element, raisins are a great addition, but they’re totally optional.
Tools You’ll Need:
- 9×13-inch baking pan – This is the ideal size to bake your squares, ensuring the right thickness for both the crust and the filling.
- Mixing bowls – For combining the crust ingredients and the filling ingredients.
- Pastry cutter or hands – To mix the butter into the flour for the crust, creating the perfect crumbly texture.
- Whisk – To beat the eggs and mix the filling ingredients until smooth.
Step-by-Step Guide to Making Butter Tart Squares
Now that you know the key ingredients, let’s walk through the process of making these delightful squares. Follow this simple recipe to create a batch of Butter Tart Squares that will have everyone coming back for more.
Prep Time: 15 minutes
Cook Time: 30 minutes
Total Time: 45 minutes
Servings: 36 squares
For the Crust:
- Prepare the Pan: Start by lining a 9×13-inch baking pan with parchment paper, ensuring it hangs over the edges for easy removal. Lightly spray the paper with non-stick spray to prevent sticking.
- Mix the Crust: In a large bowl, combine the flour and powdered sugar. Add the cold, cubed butter. Use a pastry cutter or your hands to work the butter into the flour mixture until it forms pea-sized crumbs. If the mixture doesn’t hold together when you squeeze it, add a tablespoon of cold water, one at a time, until it does.
- Press the Crust into the Pan: Dump the crumbly mixture into the prepared pan and press it down evenly to form the crust. Bake in a preheated oven at 350°F (175°C) for 10 minutes. While it bakes, prepare the filling.
For the Filling:
- Melt the Butter: In a medium bowl, melt the butter in the microwave. Once melted, whisk in the brown sugar until the mixture is smooth.
- Add the Eggs: Add the eggs, one at a time, whisking after each addition. This ensures the eggs are fully incorporated into the filling.
- Flavor the Filling: Stir in the vanilla extract and white vinegar. If you’re using raisins, now’s the time to add them in.
- Pour the Filling: Once the crust is done baking, remove it from the oven and pour the filling evenly over the hot crust.
- Bake the Squares: Return the pan to the oven and bake for 25-30 minutes, or until the filling is set with only a slight jiggle in the center. Be careful not to over-bake—over-baking can lead to a dry, crumbly filling.
- Cool and Slice: Allow the squares to cool to room temperature, then refrigerate them for a few hours to help them firm up. Once chilled, cut into squares and enjoy!

Pro Tips for Perfect Butter Tart Squares
- Watch the Bake Time: For gooey squares, it’s important not to over-bake the filling. It should be set but still slightly wobbly in the center.
- Chill Before Cutting: Allowing the squares to cool and chill before cutting helps the filling set and makes them easier to slice into neat squares.
- Customize the Filling: Feel free to add nuts, such as pecans or walnuts, for a delightful crunch. Or experiment with flavored extracts like maple or rum for an extra twist.
Storing and Freezing Your Butter Tart Squares
Once you’ve made your Butter Tart Squares, you might find yourself with a lot of leftovers (or maybe not!). No worries—these squares store well, and there are ways to keep them fresh for later. Here’s how to properly store and even freeze your Butter Tart Squares for future enjoyment.
How to Store Butter Tart Squares
- Room Temperature: If you’re planning to eat your Butter Tart Squares within a few days, store them at room temperature. Simply place them in an airtight container or cover them tightly with plastic wrap. They’ll stay fresh for up to 3 days.
- Refrigeration: To make them last longer, refrigerate your Butter Tart Squares. Place them in an airtight container to prevent them from drying out. These squares will keep well in the fridge for up to 1 week, allowing you to enjoy them at your leisure.
Freezing Butter Tart Squares
If you want to keep your Butter Tart Squares for an extended period, freezing them is a great option. Here’s how to do it properly:
- Cool Completely: Make sure your Butter Tart Squares are completely cooled before freezing them. This prevents condensation from forming inside the container, which could cause them to become soggy.
- Layering for Freezing: Place your squares in an airtight container or freezer bag. If you’re stacking the squares, place wax paper or parchment paper between the layers to prevent them from sticking together.
- Freeze for Up to 3 Months: Butter Tart Squares freeze beautifully and can be stored for up to 3 months. When you’re ready to enjoy them, simply remove them from the freezer and let them thaw at room temperature for 20-30 minutes.
- Quick Thaw Option: If you’re in a hurry, you can eat them straight out of the freezer. They’re still delicious when slightly frozen, making them a great treat for those moments when you need a quick sweet snack.
Variations of Butter Tart Squares: Making Them Your Own
One of the best things about Butter Tart Squares is how easy it is to make them your own. You can tweak the recipe to suit your taste preferences or to give it a unique twist. Here are some ideas to make your Butter Tart Squares stand out:
1. Add Nuts for Crunch
Adding chopped pecans, walnuts, or even almonds can give your Butter Tart Squares a delightful crunch. These nuts pair beautifully with the caramelized filling and buttery crust.
2. Go Maple
Maple syrup is a beloved Canadian flavor, and it can add a rich, aromatic twist to your Butter Tart Squares. Swap out the white vinegar for maple syrup to deepen the flavor and give the squares a more authentic Canadian taste.
3. Add Chocolate
For a decadent, indulgent twist, try adding chocolate chips or chunks to the filling. The sweetness of the brown sugar and butter combined with the richness of chocolate creates an irresistible flavor combination.
4. Raisins or No Raisins?
The addition of raisins is a classic choice, but feel free to skip them if they aren’t your favorite. Some people love the chewy texture they add, while others prefer a smooth, gooey filling without the fruit. It’s all about what you enjoy most!
5. Experiment with Flavors
If you’re feeling adventurous, you can experiment with different extracts, like rum, almond, or even a touch of cinnamon, to elevate the flavor profile of your Butter Tart Squares. A small amount can go a long way in enhancing the overall taste of the filling.
FAQs on Butter Tart Squares
Q: Can I use salted butter for the crust?
A: It’s best to use unsalted butter for both the crust and the filling, as it gives you more control over the level of saltiness in the final product. If you only have salted butter, just skip any additional salt in the recipe.
Q: Can I make Butter Tart Squares gluten-free?
A: Yes, you can easily make gluten-free Butter Tart Squares by using a gluten-free all-purpose flour blend in place of the regular flour. Just ensure your other ingredients are also gluten-free (such as the powdered sugar and vanilla extract).
Q: What’s the best way to cut Butter Tart Squares neatly?
A: To cut Butter Tart Squares neatly, it helps to let them cool completely and refrigerate them for a few hours. Use a sharp knife to cut them into even squares. If the knife becomes sticky, wipe it clean between cuts.
Q: Can I add coconut to the filling?
A: Yes! Adding shredded coconut is a fun variation that adds texture and flavor. It pairs beautifully with the caramelized filling and gives the squares an extra chewy bite.
Why Butter Tart Squares Are Perfect for Every Occasion
Whether you’re baking for a holiday or simply craving a sweet treat, Butter Tart Squares are the ideal dessert. They are simple to make, offer endless customization options, and are always a crowd-pleaser. Plus, their ability to be stored and frozen makes them perfect for busy people who love to have a homemade dessert on hand for any occasion.
So, the next time you’re in the mood for a classic Canadian dessert with a modern twist, turn to these delicious Butter Tart Squares. With their perfect balance of sweet, gooey filling and buttery crust, they’re sure to become a new favorite in your baking repertoire.
Serving Suggestions for Butter Tart Squares
Now that you’ve perfected your Butter Tart Squares, it’s time to serve them up and enjoy them with friends and family. While these squares are delicious on their own, here are a few serving ideas to elevate the experience:
1. Serve with a Cup of Coffee or Tea
A warm cup of coffee or tea complements the sweet richness of Butter Tart Squares perfectly. The bitterness of the coffee or the lightness of the tea balances the sugar, creating a delightful pairing.
2. Top with Ice Cream
For an indulgent treat, serve your Butter Tart Squares with a scoop of vanilla or caramel ice cream. The cold ice cream contrasts beautifully with the warm squares, creating an irresistible combination.
3. Drizzle with Chocolate or Caramel Sauce
For those with a serious sweet tooth, drizzle some melted chocolate or caramel sauce over the Butter Tart Squares. This extra touch adds a luxurious element to the already delicious dessert.
4. Make Them Bite-Sized
If you’re planning to serve Butter Tart Squares at a party or gathering, consider cutting them into smaller, bite-sized squares. They’re perfect for snacking and can be enjoyed without the need for a fork or plate.
5. Garnish with Fresh Fruit or Nuts
Add a little freshness and crunch to your Butter Tart Squares by garnishing them with fresh berries, like raspberries or blueberries, or sprinkle some chopped nuts, such as pecans or walnuts, on top.
Conclusion
Butter Tart Squares are the ultimate dessert for anyone who enjoys a rich, sweet, and buttery treat. They’re quick, easy, and versatile, making them a great choice for both seasoned bakers and beginners alike. Whether you prefer them with raisins, nuts, or a touch of maple syrup, this recipe can be easily adapted to suit your tastes. From family dinners to special occasions, Butter Tart Squares will surely become a favorite dessert.
By following this simple recipe, you’ll create a batch of Butter Tart Squares that are not only delicious but also visually appealing. Plus, with options for customization, storing, and freezing, you can always have a batch on hand for when you need a sweet treat.
Remember, the key to perfect Butter Tart Squares is getting the right balance of gooey filling and crumbly crust. Don’t rush the process, and be sure to let them cool and set before cutting. Once you master this recipe, you’ll be baking Butter Tart Squares for every occasion!
Butter Tart Squares Recipe Card
Ingredients:
For the Crust:
- 2 cups all-purpose flour
- 4 tbsp powdered icing sugar
- 1 cup unsalted butter (cold, cubed)
- 1-2 tbsp cold water (optional)
For the Filling:
- 1/2 cup unsalted butter (melted)
- 3 cups brown sugar (lightly packed)
- 4 large eggs
- 1-2 tbsp white vinegar
- 1 tbsp vanilla extract
- ¾ cup raisins (optional)
Instructions:
- Preheat the Oven: Preheat your oven to 350°F (175°C). Line a 9×13-inch baking pan with parchment paper and lightly spray with non-stick spray.
- Prepare the Crust: In a large bowl, combine the flour and powdered icing sugar. Add the cold, cubed butter. Use a pastry cutter or your hands to work the butter into the flour mixture until it forms pea-sized crumbs. If the mixture doesn’t hold together when squeezed, add 1-2 tbsp cold water.
- Bake the Crust: Press the crumbly mixture into the prepared pan and bake for 10 minutes.
- Prepare the Filling: In a medium bowl, melt the butter in the microwave. Whisk in brown sugar until smooth. Add the eggs, one at a time, whisking after each addition. Stir in the vinegar and vanilla extract. Add raisins if using.
- Bake the Squares: Pour the filling evenly over the baked crust. Return the pan to the oven and bake for 25-30 minutes, or until the filling is set with only a slight jiggle in the center.
- Cool and Slice: Allow the squares to cool to room temperature. Refrigerate for several hours to set. Once chilled, cut into squares and enjoy!
Notes:
- Storage: Store Butter Tart Squares in an airtight container at room temperature for up to 3 days or refrigerate for up to 1 week.
- Freezing: Freeze for up to 3 months by placing squares in an airtight container or freezer bag with wax paper between layers.
- Add-ins: Customize with nuts (pecans, walnuts) or a hint of maple syrup for added flavor.
- Gluten-Free: Swap the all-purpose flour with a gluten-free flour blend if needed.
Nutritional Facts (per serving):
- Calories: 174 kcal
- Carbohydrates: 25g
- Protein: 2g
- Fat: 8g
- Saturated Fat: 5g
- Cholesterol: 44mg
- Sodium: 53mg
- Sugar: 17g
- Fiber: 1g