
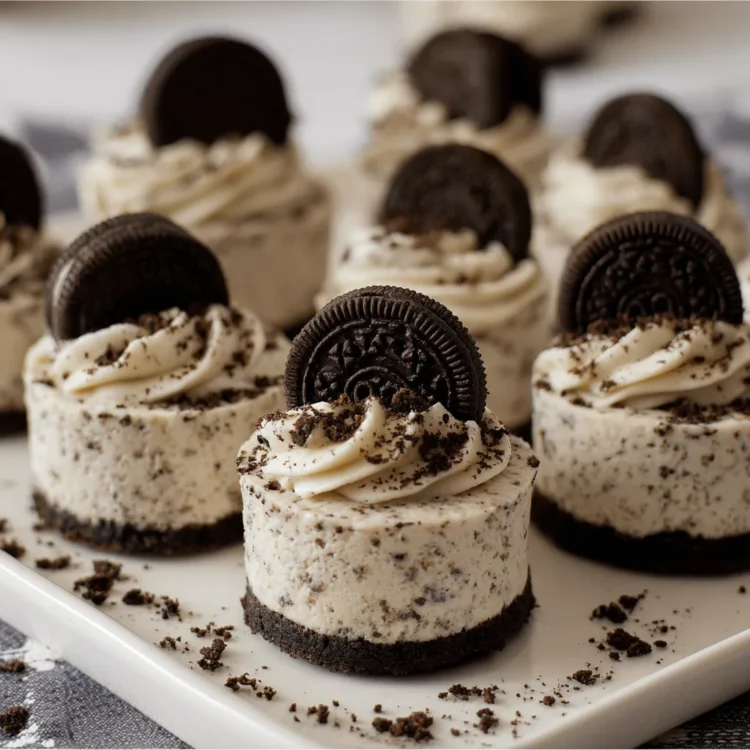
Mini Oreo cheesecakes are a delightful, easy-to-make dessert that’s perfect for any occasion. These delicious little bites combine the creamy texture of cheesecake with the irresistible crunch of Oreos. With a no-bake recipe, they save you time while delivering all the flavor you crave. Whether you’re hosting a party, bringing a treat to a potluck, or just satisfying a sweet tooth, these mini cheesecakes will surely hit the spot.
What Makes No-Bake Mini Oreo Cheesecakes So Special?
No-bake mini Oreo cheesecakes are the ultimate dessert for those who want the indulgence of a cheesecake without the hassle of baking. These mini cheesecakes are made with simple ingredients that you likely already have in your pantry, including Oreos, cream cheese, and heavy whipping cream.
Benefits of No-Bake Mini Oreo Cheesecakes:
-
Simplicity: The recipe is easy to follow and requires no baking, making it ideal for beginners.
-
No Oven Required: A great option for hot weather when turning on the oven isn’t appealing.
-
Perfectly Portion-Controlled: These mini cheesecakes are individually sized, making them easy to serve and share.
-
Customizable: You can tweak the recipe to suit your taste by switching up the toppings or using different flavors of Oreos.

Ingredients You’ll Need
To make these scrumptious mini cheesecakes, you don’t need fancy ingredients. Everything you need is easy to find and affordable. Here’s a breakdown of the key ingredients:
For the Crust
-
Oreo Cookie Crumbs – You can use regular or even flavored Oreos to create the crust.
-
Butter – Butter helps bind the crumbs together and gives the crust that rich, buttery flavor.
For the Filling
-
Cream Cheese – Use full-fat cream cheese for a rich and creamy filling.
-
Sugar – Regular granulated sugar adds sweetness to the filling.
-
Sour Cream – This adds a slight tang and creaminess to balance the sweetness.
-
Vanilla Extract – A dash of vanilla adds warmth and enhances the overall flavor.
-
Heavy Whipping Cream – This is essential for making the filling light and fluffy.
-
Powdered Sugar – Helps stabilize the whipped cream.
-
Oreo Crumbs – For mixing into the cheesecake filling to add that Oreo flavor.
-
Chopped Oreos – Adding pieces of Oreos to the filling makes every bite even more enjoyable.
For the Whipped Cream Topping
-
Heavy Whipping Cream – Cold whipping cream is key for a light and airy whipped cream topping.
-
Powdered Sugar – A small amount to sweeten and stabilize the whipped cream.
-
Vanilla Extract – Adds a subtle flavor that complements the dessert.
-
Oreo Crumbs – Used to give the whipped cream topping an extra Oreo crunch.
-
Whole Oreos – For garnishing and giving the final cheesecake a finished look.
Step-by-Step Guide to Making No-Bake Mini Oreo Cheesecakes
Making these mini cheesecakes is easier than it sounds. Here’s a step-by-step breakdown of how to prepare them:
1. Prepare the Crust
The crust is the base of your mini Oreo cheesecakes, and it’s where the Oreo flavor truly shines. To create the crust:
-
Crush the Oreos – Start by crushing about 10 regular Oreos into fine crumbs. You can do this by using a food processor or placing the cookies in a plastic bag and crushing them with a rolling pin.
-
Melt the Butter – Melt about 3 tablespoons of butter and combine it with the crushed Oreos.
-
Mix Together – Stir the crumbs and butter together until everything is well-coated.
-
Fill the Cups – Place cupcake liners in a muffin tin and divide the crust mixture among the cups. Press the crumbs down with the back of a spoon or your fingers to form a compact base.
-
Chill the Crusts – Place the muffin tin in the fridge to set while you prepare the filling. This helps the crust firm up before adding the filling.
2. Make the Creamy Filling
Now it’s time to make the creamy, dreamy cheesecake filling. Here’s how:
-
Mix the Cream Cheese – In a large bowl, beat the cream cheese and sugar together until smooth and creamy. Be sure the cream cheese is at room temperature to avoid lumps.
-
Add Sour Cream and Vanilla – Mix in the sour cream and vanilla extract until the mixture is fully combined.
-
Whip the Cream – In a separate bowl, whip the cold heavy whipping cream and powdered sugar until stiff peaks form. This will create the light and fluffy texture needed for the filling.
-
Combine the Mixtures – Gently fold the whipped cream into the cream cheese mixture. Be careful not to deflate the whipped cream.
-
Add the Oreo Crumbs – Stir in some additional Oreo crumbs and chopped Oreos for that signature Oreo crunch in every bite.
3. Assemble the Cheesecakes
Once the filling is ready, it’s time to assemble the mini cheesecakes:
-
Fill the Cups – Spoon or pipe the cheesecake mixture into the prepared cupcake liners. Fill each one to the top, smoothing the surface with a spoon or spatula.
-
Chill the Cheesecakes – Place the mini cheesecakes in the fridge for 3-4 hours, or until they firm up completely.
4. Add the Whipped Cream Topping
A whipped cream topping is the perfect finishing touch for these mini cheesecakes. To make it:
-
Whip the Cream – In a separate bowl, beat the heavy whipping cream, powdered sugar, vanilla extract, and Oreo crumbs until stiff peaks form.
-
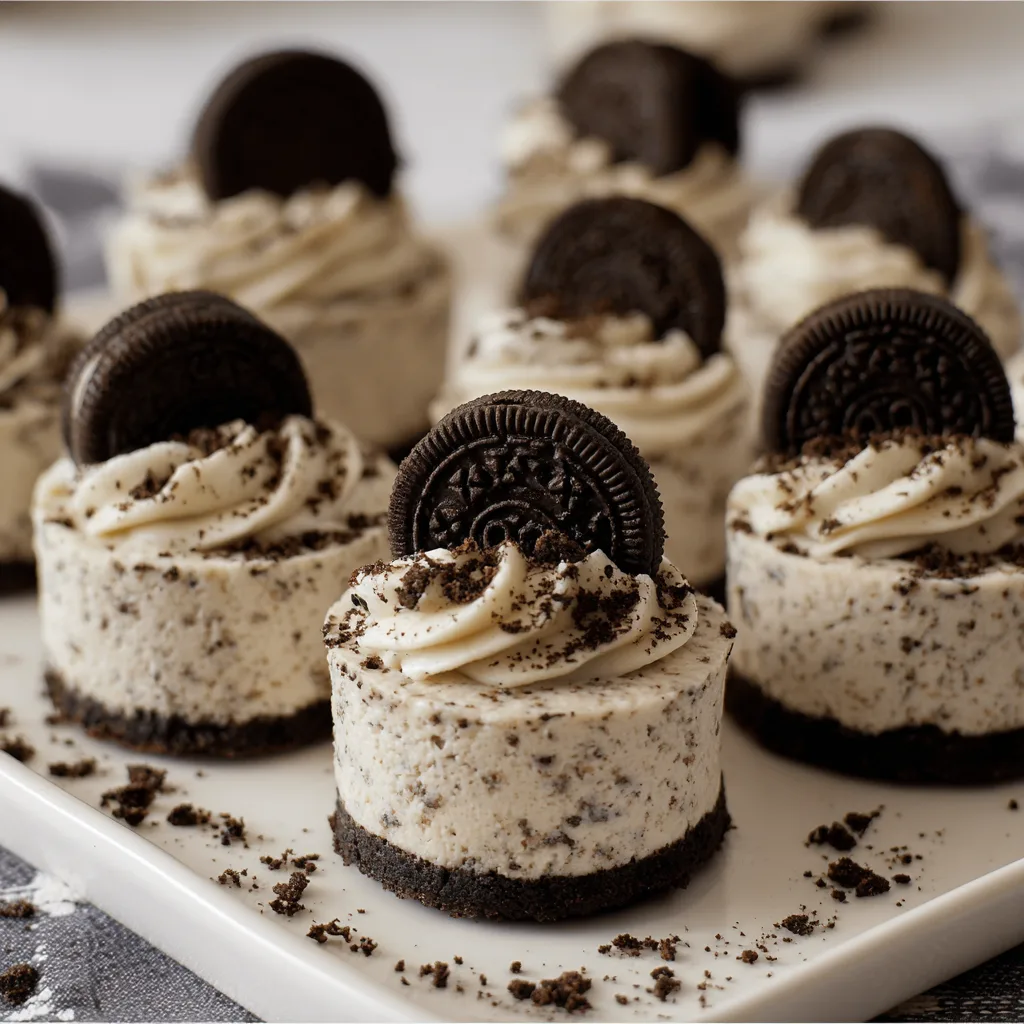
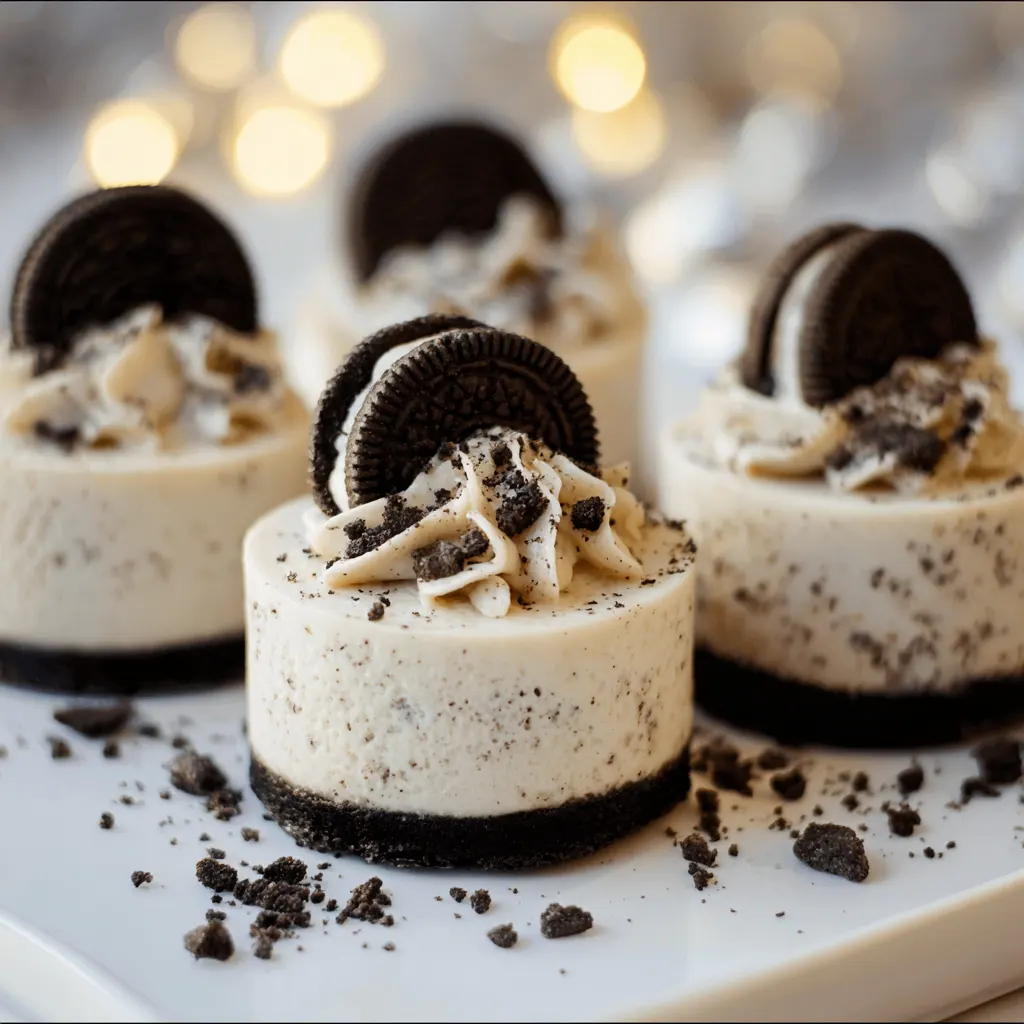
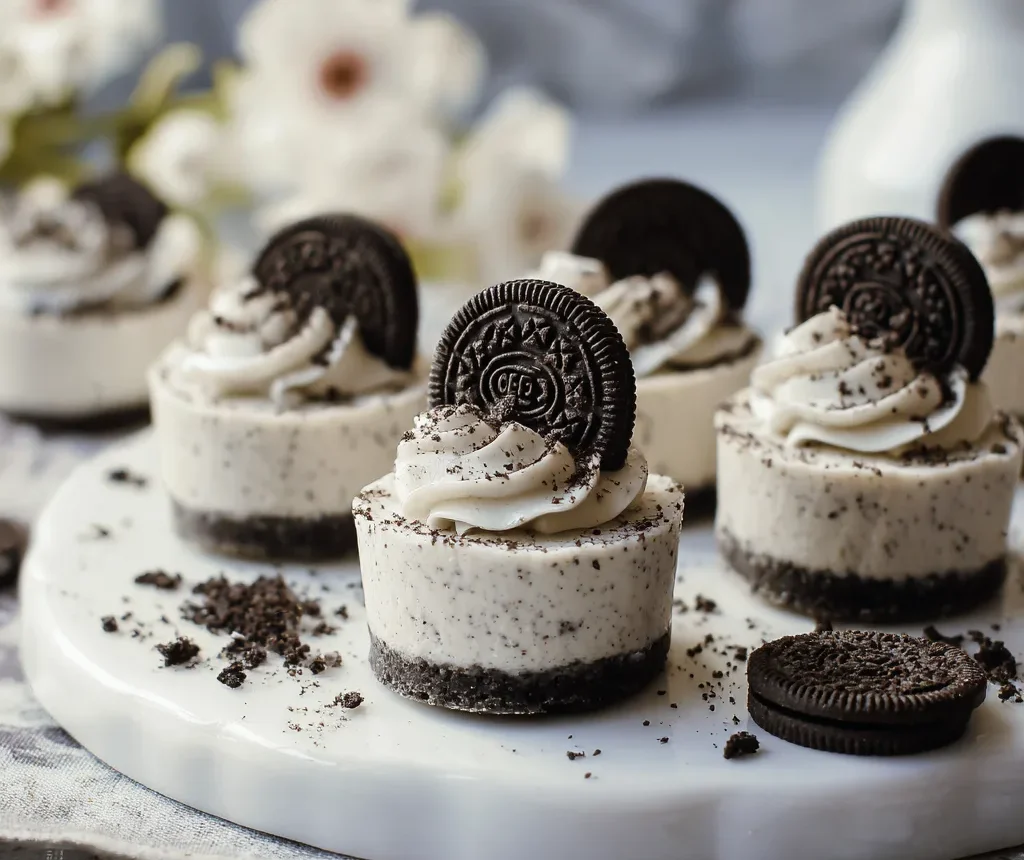
Pipe the Whipped Cream – Pipe the whipped cream onto each mini cheesecake, creating a swirl on top for a decorative and delicious finish.
-
Top with an Oreo – Finally, place a whole Oreo on top of each mini cheesecake for a classic touch.
Helpful Tips for Making the Best No-Bake Mini Oreo Cheesecakes
Creating perfect mini cheesecakes is easy with these pro tips:
-
Use Room Temperature Cream Cheese – Cold cream cheese can result in a lumpy filling. Let it sit at room temperature for about 30 minutes before using it.
-
Chill the Filling – Don’t skip the chilling step. Allowing the cheesecakes to firm up in the fridge is crucial for the best texture.
-
Gently Fold the Whipped Cream – To maintain the light texture, gently fold the whipped cream into the cheesecake mixture instead of mixing it too vigorously.
-
Customize the Crust – Feel free to experiment with different cookie crusts like vanilla wafers or graham crackers to add variety to your cheesecakes.
-
Make Ahead – These cheesecakes can be made a day in advance, making them perfect for parties or gatherings.
How to Store and Serve Mini Oreo Cheesecakes
Once your mini Oreo cheesecakes are assembled, you’ll want to store them properly to maintain their freshness. Here are some tips to keep them at their best:
-
Refrigeration – Store the mini cheesecakes in an airtight container in the fridge for up to 4-5 days. The cooler temperature will help them stay firm and fresh.
-
Freezing – If you want to make them ahead of time, these mini cheesecakes can be frozen! Just make sure to store them in an airtight container in the freezer for up to 3 months. Thaw in the fridge before serving. Freezing them before adding the toppings ensures that the whipped cream and Oreo garnish will stay fresh and crisp when served.
-
Serving Tips – To make the mini cheesecakes more accessible, remove them from their liners before serving. This makes them easier to grab and adds a more polished look to your presentation. Serve them with a glass of milk, a scoop of vanilla ice cream, or even a drizzle of homemade chocolate sauce for an extra indulgence.
Customizing Your No-Bake Mini Oreo Cheesecakes
One of the great things about no-bake mini Oreo cheesecakes is how customizable they are. You can easily change up the flavor, texture, and toppings to match your preferences or the theme of your event.
Here are a few fun twists to try:
Change the Cookie Base
-
Graham Cracker Crust: For a more traditional cheesecake feel, swap the Oreo crust for a graham cracker crust. Simply use graham cracker crumbs and butter instead of Oreos.
-
Chocolate Chip Cookie Crust: If you’re a fan of chocolate chip cookies, crush up some cookies and combine them with butter for a unique base.
Switch Up the Filling
-
Flavored Cheesecake: Add some lemon zest, mint extract, or fruit puree to the cream cheese mixture for a burst of flavor. Lemon or mint Oreos can enhance the experience even further!
-
Add Chocolate: You can melt some chocolate and fold it into the cream cheese mixture to make a chocolate-flavored cheesecake filling. This adds richness and depth to the dessert.
Creative Toppings
-
Fruit Toppings: Fresh fruits like raspberries, strawberries, or blueberries add a light, refreshing contrast to the rich filling. You can also create a fruit compote to drizzle on top.
-
Caramel Drizzle: For a decadent twist, drizzle some caramel sauce over the top of each mini cheesecake before adding the whipped cream.
-
Crushed Candy: Crushed candy like Reese’s Peanut Butter Cups or M&M’s can add a colorful and fun touch.
Experimenting with these ideas can help you create a dessert that’s perfectly tailored to your tastes or the occasion.
The Best Occasions for Serving No-Bake Mini Oreo Cheesecakes
These mini cheesecakes are versatile and perfect for a variety of events. Their bite-sized nature makes them ideal for sharing, and their delicious taste will please any crowd.
Party Time
-
Birthday Parties: No-bake mini Oreo cheesecakes are perfect for parties of all ages. Their individual size makes them easy to serve, and everyone loves the Oreo flavor.
-
Holiday Gatherings: Whether it’s Christmas, Thanksgiving, or a summer barbecue, these mini cheesecakes fit right in with the holiday spread. Customize them with festive toppings like holiday-themed Oreos or edible glitter for extra flair.
Casual Treats
-
Afternoon Snacks: These cheesecakes are great for a midday treat. Pair them with coffee or tea for an indulgent yet easy snack.
-
Movie Nights: Watching a movie at home? These mini cheesecakes are a perfect, mess-free dessert to enjoy while lounging on the couch.
Special Occasions
-
Baby Showers or Bridal Showers: If you’re hosting a shower, these mini cheesecakes will be a hit. They’re cute, easy to eat, and guests will appreciate the attention to detail.
-
Potlucks: No-bake mini cheesecakes are perfect for potlucks because they’re easy to transport and serve. They can be made ahead of time, saving you last-minute stress.
Nutrition Facts for Mini Oreo Cheesecakes
While these cheesecakes are indulgent, knowing the nutrition facts can help you enjoy them guilt-free in moderation. Here’s an estimate of the nutrition for each mini cheesecake:
| Nutrient | Per Serving |
|---|---|
| Calories | 283 |
| Fat | 17.7g |
| Carbohydrates | 28g |
| Sugar | 22.7g |
| Protein | 3.8g |
| Cholesterol | 44mg |
| Sodium | 194.4mg |
Troubleshooting Common Issues with No-Bake Mini Oreo Cheesecakes
While making no-bake mini Oreo cheesecakes is relatively simple, there are a few things you might encounter that could affect the outcome. Here’s how to handle common issues:
1. Crust Not Firming Up
If your crust isn’t firming up properly after chilling, it could be due to too much butter or not pressing the crumbs down enough.
Solution:
-
Ensure you’ve measured the butter accurately. If it’s too much, the crust will be soggy.
-
Press the crumbs down firmly to create a solid base. You can use the back of a spoon or even your fingers to press it down tightly.
-
Double-check that the crust is chilled long enough, at least 30 minutes, to ensure it sets properly.
2. Cheesecake Filling Too Runny
If the cheesecake filling turns out too runny, it likely means the whipped cream wasn’t whipped properly or the mixture was overworked.
Solution:
-
Make sure the heavy cream is cold before whipping it. Cold cream whips up better and holds its shape.
-
When folding the whipped cream into the cheesecake mixture, do it gently to avoid deflating the whipped cream and losing air.
-
Let the cheesecakes chill long enough to firm up, at least 3-4 hours. If needed, leave them longer for an even firmer texture.
3. Whipped Cream Topping Flops
If your whipped cream topping doesn’t form stiff peaks or falls flat, the cream may not have been cold enough, or you might have overwhipped it.
Solution:
-
Always start with cold heavy whipping cream. If the cream isn’t cold, it won’t whip properly.
-
Be careful not to overwhip the cream. Stop once you reach stiff peaks, as whipping for too long can cause it to turn into butter.
-
Stabilize the whipped cream by adding a small amount of powdered sugar, which helps it hold its shape.
4. Soggy Oreos on Top
If the Oreo cookies on top of your cheesecakes become soggy, it’s because they’ve been sitting on the cheesecake too long.
Solution:
-
Add the Oreo cookie garnish just before serving to maintain their crispness.
-
You can also use a thicker layer of whipped cream between the cookie and the cheesecake to act as a barrier, keeping the cookie crunchy longer.
Why You Should Make No-Bake Mini Oreo Cheesecakes
No-bake mini Oreo cheesecakes offer a wonderful combination of convenience, flavor, and versatility. Whether you are making them for a special occasion or as a sweet treat just for yourself, these cheesecakes will always impress. The best part is that they are super easy to make, and there’s no need to worry about timing or oven temperature.
These cheesecakes are not only delicious but customizable to suit your taste. The Oreo crust and filling combination makes them an instant favorite, but you can also get creative with different crusts, fillings, and toppings. You could even make these cheesecakes ahead of time, leaving you with less stress when it’s time to serve them.
FAQs On No-Bake Mini Oreo Cheesecakes
1. What is the Philadelphia Mini Oreo Cheesecake Recipe?
It’s a mini Oreo cheesecake made with Philadelphia cream cheese for a creamy, rich texture.
2. What Makes No-Bake Oreo Cheesecake Special?
It’s easy to make without baking, offering a creamy and light texture with the same great taste.
3. How Do I Make a Simple Oreo Cheesecake?
Crush Oreos for the crust, mix cream cheese, sugar, and whipped cream for the filling, then refrigerate to set.
4. How Does Mini Oreo Cheesecake Taste?
It’s rich, creamy, and full of Oreo flavor with a crunchy crust and smooth filling.
5. Can I Make No-Bake Mini Cheesecakes in Advance?
Yes, they can be made ahead and stored in the fridge for several hours or overnight.
Conclusion on No-Bake Mini Oreo Cheesecakes
no-bake mini Oreo cheesecakes are the ultimate dessert for anyone who loves a rich, creamy treat that doesn’t require turning on the oven. Their individual portions make them perfect for sharing, and their easy preparation process means you can spend more time enjoying your dessert and less time in the kitchen. With endless possibilities for customization, you’ll be able to make these mini cheesecakes a part of your regular dessert rotation, no matter the occasion.
Perfect No-Bake Mini Oreo Cheesecakes Recipe
Ingredients
Method
- Prepare the Crust:
- Crush Oreos into fine crumbs and mix with melted butter.
- Divide the mixture into cupcake liners and press into the bottom to form the crust.
- Chill in the fridge while preparing the filling.
- Make the Filling:
- Beat cream cheese and sugar until smooth.
- Add sour cream and vanilla extract, then mix well.
- Whip heavy whipping cream and powdered sugar until stiff peaks form, then fold into the cream cheese mixture.
- Stir in Oreo crumbs and chopped Oreos.
- Assemble:
- Spoon or pipe the filling into the prepared cupcake liners.
- Refrigerate for 3-4 hours or until set.
- Whipped Cream Topping:
- Whip heavy whipping cream, powdered sugar, vanilla, and Oreo crumbs until stiff peaks form.
- Pipe on top of each mini cheesecake and garnish with an Oreo.
Notes
- Use room temperature cream cheese for a smooth filling.
- For a different flavor, try adding fruit or flavored Oreos.
- You can make these ahead of time and store in the fridge for up to 4 days.
Nutritional Facts (per serving):
- Calories: 283
- Fat: 17.7g
- Carbohydrates: 28g
- Sugar: 22.7g
- Protein: 3.8g
- Cholesterol: 44mg
- Sodium: 194.4mg